
Tuesday, December 4, 2012


Sunday, November 18, 2012
Thanksgiving Week
The thankful tree

This year the "Thankful Tree" was by far the most popular item of the season.
The e-store has
not yet re-opened but we had them in the Etsy Store
and couldn't keep them in stock!

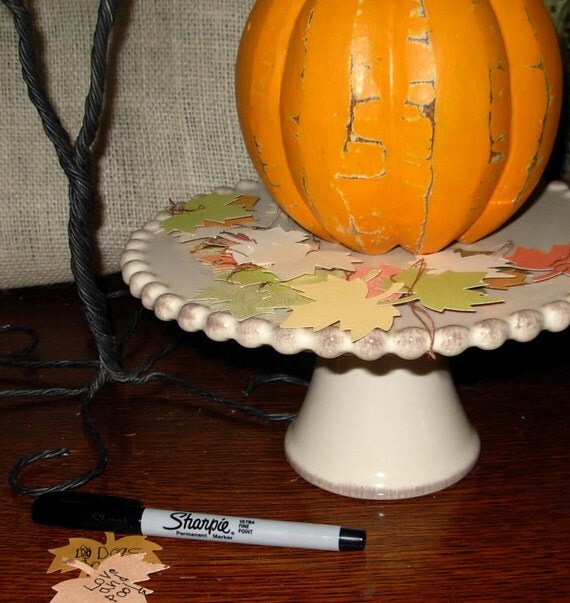 |
| Thankful Leaves |
I love thinking
about all the little blessings and
thoughts of
gratitude people have hanging on their
"Thankful
Trees"!
I hope everyone
has a great Thanksgiving Week!

Wednesday, October 31, 2012

Wednesday, October 3, 2012

Tuesday, August 7, 2012
Tuesday Tip-How to Pick a Watermelon

via What About a Watermelon

2. LIFT – The ripest watermelons have the most water. And since watermelons are 92 percent water, your watermelon should be relatively heavy for its size.
3. TURN – Turn your watermelon over and check out its bottom, which should have a creamy yellow spot (also called “the ground spot”). This is where the watermelon sat on the ground while it soaked up the sun at the farm. If this spot is white or greenish, your watermelon may have been picked too soon and might not be as ripe as it should be.
 |
| via The Kitchen |
Saturday, June 23, 2012
Patriotic Trifle
 |
| Patriotic Trifle published in Simple & Delicious July/August 2007, p15 |
Ingredients
- 1 package (3 ounces) berry blue gelatin
- 1 package (3 ounces) strawberry gelatin
- 2 cups boiling water
- 1 cup cold water
- 2 cups cold whole milk
- 2 packages (3.4 ounces each) instant vanilla pudding mix
- 1 carton (8 ounces) frozen whipped topping, thawed, divided
- 1 pint fresh blueberries
- 1 quart fresh strawberries, quartered
- 1 prepared angel food cake (8 to 10 ounces), cut into 1-inch cubes
Directions
- In two small bowls, combine each gelatin flavor with 1 cup boiling water. Stir 1/2 cup cold water into each. Pour each into an ungreased 9-in. square pan. Refrigerate for 1 hour or until set.
- In a large bowl, whisk milk and pudding mixes for 2 minutes. Let stand for 2 minutes or until soft-set. Fold in 2 cups whipped topping.
- Set aside 1/4 cup blueberries and 1/2 cup strawberries for garnish. Cut the gelatin into 1-in. cubes. In a 3-qt. trifle bowl or serving dish, layer the strawberry gelatin, half of the cake cubes, the remaining blueberries and half of the pudding mixture.
- Top with blue gelatin and remaining cake cubes, strawberries and pudding mixture. Garnish with reserved berries and remaining whipped topping. Serve immediately. Yield: 16-20 servings.
Monday, June 18, 2012
Red, White and Blue Bunting
Patriotic
Bunting for the 4th


Ignite your Fourth of July festivities with a fresh stars and stripes theme. We played out our patriotic style by updating traditional bunting with crisp polka-dot and stripe fabrics, then covered cushions in more stripes and checks to amplify the fun. Here’s how you can make your own bunting.
What you'll need:
To make the bunting:
1. Measure the width of the window or other opening where you plan to hang your bunting. This will be the total width for your bunting, and the drop will be half the width measurement. (Example: 72 inches wide divided by 2 = 36 inch drop.)
To determine yardage, multiply the drop measurement by 3-1/4 + 2 extra inches to finish ends. Example: 36 x 3-1/4 = 117 + 2 = 119. So for this width, you will need 3-1/3 yards of fabric (119 divided by 36 = 3-1/3 yards).
2. You will cut a total of 5 strips of fabric for bunting: two red, two white, and one blue. To determine the width of each strip of fabric, divide 5 into the drop measurement, add 1 inch to each white and blue strip of fabric for seam allowances, and add 1-1/2 inch to each of the two red outside strips for seam allowances and hem/finishing. (Example: 36-inch drop divided by 5 = 7-1/4 + 1 = 8-1/4 inch width strips for both white and blue fabrics. 36-inch drop divided by 5 = 7-1/4 + 1-1/2 = 8-3/4 inch width strips for red fabrics.) Cut out strips.
3. Sew strips together in color sequence as per photo using 1/2-inch seam allowances. Clean finish or serge the seams. Narrow hem the bottom edge of one of the red strips.
4. Mark the center of the top red strip of fabric and box-pleat toward center about 5 times to take up the fullness. Gather the pleated fabric at center, if needed, to take up more fullness, keeping piece smooth.
5. Rod Pocket: Cut a strip of red fabric to encase the spring tension rod, adding 1 inch for seam allowances. Encase raw ends of top of bunting/pleating into the rod pocket.
6. Insert pressure rod into casing for hanging.
*Option: Add grommets along casing for hanging.
|
Thursday, June 14, 2012
Tuesday Tip - Fly those Flags!

Today is Flag Day!
 |
| via Country Living |
Flag Etiquette
Here are some tips to make sure your tribute is a respectful one:
-Display the flag only between sunrise and sunset on buildings and stationary flagstaffs. The flag may be displayed for twenty-four hours if illuminated in darkness.- Do not display the flag in inclement weather.
- Whether displaying the flag vertically or horizontally, make sure the canton of stars is visible on the upper left-hand side.
- Do not let the flag touch the ground.
- The flag should be hoisted briskly and lowered ceremoniously.
- Before flying a flag at half-staff, hoist to its peak for an instant before lowering it.
- When displayed against a wall with another flag, their staffs crossed, the American flag should be on the right of the other flag (on the viewer's left), with its staff on top of that of the other flag.
- When flags of states, cities, or localities are flown on the same halyard with the United States flag, the national flag should always be at the top. No other flag should be placed above, or if on the same level, to the flag's right.
- When flags of two or more nations are displayed, they should be flown from separate staffs of equal height. The flags should be of approximately equal size.
- When the flag is displayed from a staff projecting horizontally or at an angle, the canton should be placed at the peak of the staff.
- An unusable flag that is damaged and worn and can no longer be displayed should be destroyed in a dignified way by burning.
- When not on display, the flag should be respectfully folded into a triangle, symbolizing the tricorn hats worn by colonial soldiers in the Revolutionary War.

This porch displays red, white, and blue bunting (the fabric that flags are made from) that has been tacked to the eaves and tied with ribbon at the bottom. The trios of small flags are held up by aluminum brackets.
 |
| via Country Living |
Thursday, June 7, 2012
Fresh Tomato Tart
Fresh Tomato Tart
 |
| Midwest Living August 2009 Recipe from Geri Boesen |
Ingredients:
- 1/2 of a 15-ounce folded refrigerated unbaked piecrust (1 crust)
- 1-1/2 cups shredded mozzarella cheese (6 ounces)
- 4 Roma or small regular tomatoes
- 3/4 cup loosely packed fresh basil leaves
- 4 cloves garlic
- 1/4 cup grated Parmesan cheese
- 1/2 cup mayonnaise or salad dressing
- 1/8 teaspoon ground white pepper
- Fresh basil leaves (optional)
Directons:
1. Unfold the piecrust according to package directions. Line a 9-inch tart pan with pastry (it's easier to remove the baked tart if pan has a removable bottom). Press the pastry into the fluted sides of the tart pan and trim the edges. Don't prick. Partially bake in a 450 degree F oven for 5 to 7 minutes or until pastry is slightly dry.
2. Remove from oven. Sprinkle with 1/2 cup of the mozzarella cheese. Cool in pan on a wire rack. Reduce oven temperature to 375 degree F.
3. Meanwhile, cut the tomatoes into wedges; drain the wedges on paper towels. Arrange the tomato wedges over the melted cheese in a baked crust.
4. In a food processor bowl, combine basil and garlic; cover and process with on-off turns until coarsely chopped. Or snip the basil and mince the garlic.
5. In a medium mixing bowl, combine the basil-garlic mixture, the remaining shredded mozzarella cheese, the mayonnaise, the grated Parmesan cheese, and pepper. Spread the mixture evenly over tomato wedges.
6. Bake in a 375 degree F oven for about 25 minutes or until cheese is golden. Let stand 5 minutes before cutting into wedges. Serve warm. If you like, garnish with additional basil leaves. Makes 8 appetizer or 4 main-dish servings.
Wednesday, June 6, 2012
Retro Dad
Retro Father's Day Clip-Art Labels
1. Download designs. Print them onto plain or self-adhesive paper, enlarging or reducing the size as desired.
2. Affix labels to cellophane bags filled with treats, jars of homemade goodies, or store-bought products. Use double-sided tape if your labels are on plain, not self-adhesive, paper.
 |
| via Martha Stewart Living, June 2010 |
He'll go nuts for personalized pistachios -- or pickles or hot sauce. In fact, these retro labels make it a cinch to turn any of Dad's favorite foods into a custom gift for Father's Day.
How-To1. Download designs. Print them onto plain or self-adhesive paper, enlarging or reducing the size as desired.
2. Affix labels to cellophane bags filled with treats, jars of homemade goodies, or store-bought products. Use double-sided tape if your labels are on plain, not self-adhesive, paper.
Monday, May 21, 2012
Patriotic Place Setting
 |
| via Country Living |
Newspaper's faded tones lend these projects vintage appeal. This hat is brightened by a glittery rosette, a blue band trimmed with pinking shears, and a simple name banner in a bold typeface.
GLUE TIP: When working with crepe paper, use a glue stick or transfer tape. Liquid glue can cause colors to run.
Wednesday, May 2, 2012
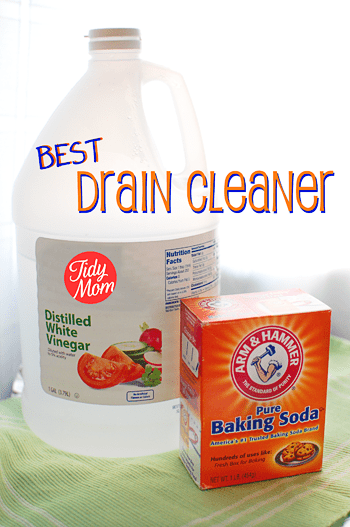
Tuesday Tip - Tub Scrub

Tub Scrub
 |
| via Martha Stewart {Body+Soul} |
Here’S a nontoxic but effective way to clean your tub: Add one teaspoon of liquid soap and several drops of an antibacterial essential (such as tea tree, eucalyptus, rosemary or peppermint) to one cup of baking soda. Add just enough water to form a paste, and use it with a sponge or brush to scour bathtub surfaces.
Tuesday, April 10, 2012
Organize the Shed

Spring-cleaning means not only giving everything a good wipe-down but decluttering your space to welcome the warmer seasons ahead.

Follow these tips and you'll breathe a sigh of spring relief.

Follow these tips and you'll breathe a sigh of spring relief.
For storing everyday garden and home tools, wood lattice is even handier than a basic trellis. Choose a heavy-duty variety, sold in sheets at hardware stores and lumberyards, and screw it onto a door using spacers. Then hang implements from S hooks, which fit snugly in the diamond framework. For items that can't be hung, attach broom clamps or suspend binder clips from hook.
Wednesday, April 4, 2012
Easy Easter Treat
Easter Peanut Butter Buttons
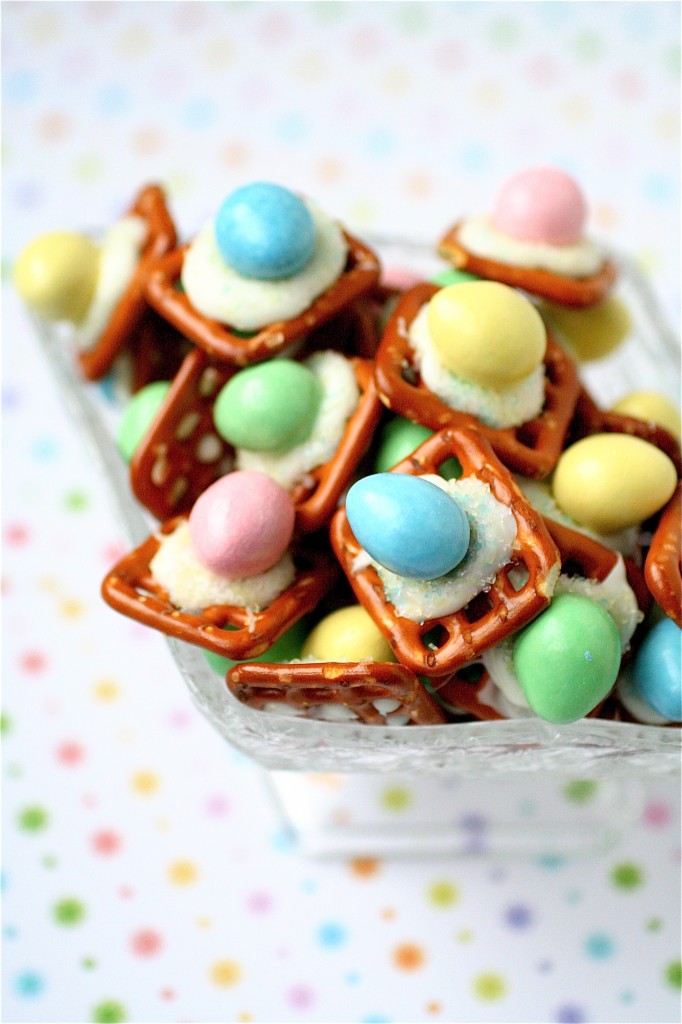 |
Ingredients:
50 mini-pretzel
{Note:Hanover’s Butter Snap used here}
1 cup white candy melts, melted
{Use your microwave and stir every 10 seconds or so after heating to make sure they melt completely}
50 Reeses Pieces pastel eggs
Pastel sprinkles, for garnish
Instructions:
For better results, make each piece one at a time. Reheat the candy melts as necessary to prevent it from hardening.
1. On wax paper, place about 1/2 teaspoon of the melted candy melts on one pretzel.
2. Decorate the candy melt with pastel sprinkles.
3. Immediately top with a pastel chocolate peanut butter egg. Let cool.
Monday, March 19, 2012
Embellished Easter Eggs
Dressed Up Eggs
Transform wooden eggs into charming Easter gifts or special decorations
that you can display for years to come—no dye required!
 |
| Project via All You |
You will need:
(makes 1 egg)
- Cloth measuring tape
- Ruler
- Wooden craft egg (at craft stores and (amazon.com)
- 6" x 6" sheet patterned origami paper (at craft stores and amazon.com)
- Pencil
- Small, sharp scissors such as embroidery or cuticle scissors
- Small fine-tipped or foam paintbrush
- Craft glue such as Mod Podge
1. Measure length and circumference of craft egg. Add ¼" to length measurement and 1/8" to circumference measurement. Use these measurements and ruler to draw a rectangle on origami paper. Cut out rectangle.
2. Fold rectangle in half lengthwise so patterned side faces inward. Use pencil and ruler to draw a line parallel to fold and ¼" above it.
3. Lay ruler along long edge of rectangle, opposite fold. Mark off ¼" increments down entire edge.
4. At each ¼" mark, cut into paper (through both layers) toward fold, being careful not to cut beyond the line above fold. Unfold paper.
5. Use brush to apply thin coat of craft glue down fold line of paper's plain side. Wrap paper lengthwise around center of egg, patterned side out and cut strips facing up and down; press against egg to adhere.
6. Beginning with top half of egg, cut one strip so it just reaches tip of egg. Brush underside of strip with glue, and press gently to adhere to egg. Work carefully to achieve a neat, attractive result.
7. Repeat Step 6 on every other paper strip on top half, smoothing each into place on egg as you go.
8. Once every other strip on top half of egg has been glued into place, repeat process with remaining strips on that half, trimming strips as necessary to fit spaces. Once all strips on top half have been glued, apply a thin coat of glue over entire half of egg to seal.
9. Repeat Steps 6 through 8 on bottom half of egg. Allow egg to dry completely (until it no longer feels tacky) before displaying.
Tuesday, March 13, 2012

Wednesday, March 7, 2012
Easter Cupcakes
Bunny Tail Lemon Cupcakes
 | |||
| image via pottery barn kids |
This recipe was featured in Pottery Barn Kids via Amanda Haas,
a cookbook writer, recipe developer, and founder of the website One Family One Meal.
Citrus Cupcakes with Lemon Buttercream Frosting
Ingredients
- 1/2 cup (1 stick) unsalted butter, room temperature
- 3/4 cup sugar
- 2 eggs
- 2 tsp lemon zest
- 1 tsp lemon juice, freshly squeezed
- 1/2 tsp vanilla
- 1 1/2 cups all purpose flour
- 1 1/2 tsp baking powder
- 1/4 tsp salt
- 1/2 cup milk
- For the frosting:
- 1 cup (2 sticks) unsalted butter, softened
- 2 cups confectioners sugar
- 2 tsp lemon zest
- 2 tbsp lemon juice, freshly squeezed
- 1 tbsp milk
- 1/4 tsp vanilla
- pinch of salt
Preparation
Preheat the oven to 350°F. Prepare a cupcake tin with 12 liners.
Combine the butter and sugar in the bowl of a stand mixer. Using the paddle attachment, cream the butter and sugar until light in texture, about 2-3 minutes. Add the eggs one at a time and beat until incorporated, scraping down the sides if necessary. Add the lemon zest, juice and vanilla, beating one more time to incorporate.
Sift together the flour, baking powder and salt. Add half the flour mixture and half the milk to the sugar mixture and blend just until combined. Scrape down the sides, then add the remaining flour and milk and mix until the batter comes together uniformly.
Divide the batter evenly among the cupcake liners, filling each about 3/4 full. Bake on the middle rack of the oven for approximately 20 minutes. Cupcakes should be firm but springy to the touch and slightly golden on top. Allow to cool completely before frosting. Frost each cupcake with a generous amount of the buttercream.
For the frosting:
In the bowl of a stand mixer fitted with the whisk attachment, cream the butter on medium speed until light and fluffy, scraping down the sides if necessary. Add 1 cup of the confectioner’s sugar, the zest and the lemon juice. Beat on medium speed until combined. Add the additional cup of confectioner’s sugar, the milk, the vanilla and a pinch of salt. Beat again until smooth. Taste, adding more confectioner’s sugar or a little more milk to reach the desired sweetness and consistency.
In the bowl of a stand mixer fitted with the whisk attachment, cream the butter on medium speed until light and fluffy, scraping down the sides if necessary. Add 1 cup of the confectioner’s sugar, the zest and the lemon juice. Beat on medium speed until combined. Add the additional cup of confectioner’s sugar, the milk, the vanilla and a pinch of salt. Beat again until smooth. Taste, adding more confectioner’s sugar or a little more milk to reach the desired sweetness and consistency.
a note from Amanda ...
♥Adding fresh lemon zest and juice to a classic vanilla cupcake lends wonderful brightness. Orange or lime zest can also be used. The lemon buttercream frosting can be made a few days ahead and kept covered in the refrigerator. Simply let it soften to room temperature before frosting.
♥I love serving cupcakes at parties. Ready-to-serve individual treats make each child feel special, and portions are kept in check.
♥I love serving cupcakes at parties. Ready-to-serve individual treats make each child feel special, and portions are kept in check. A tiny piece of cotton candy is a simple way to add visual delight.
| |
Subscribe to:
Posts (Atom)


