"10-Minute Roll Out Cookies"
FREEZE: Roll-out cookies – all the fun, none of the fuss.
Want to have ginger snowmen, fresh-baked and ready to decorate, in just 10 minutes?
Sure you do! Who wouldn’t, given the hectic schedules we all pursue at this time of the year.
Between work and holiday shopping, chores and holiday shopping, errands and holiday shopping – and holiday shopping – who has time for making cookie dough, rolling it out, cutting, carefully transferring cutouts to cookie sheets, baking, cooling…
You do!
The secret?
Doing all the heavy lifting ahead of time. Having cookies all cut out and ready to pop into the oven the moment the kids come home (or the grandchildren show up).
By the time you get the icing and sprinkles organized, and the kids settled, the cookies will be baked, cooled, and ready to ice.
No way!
Yes, absolutely. Thanks to the modern miracle of electricity and freezers, you, yes you, can cut out your cookie angels, snowmen, and stars ahead of time, freeze them, then pop them in the oven whenever you’re ready.
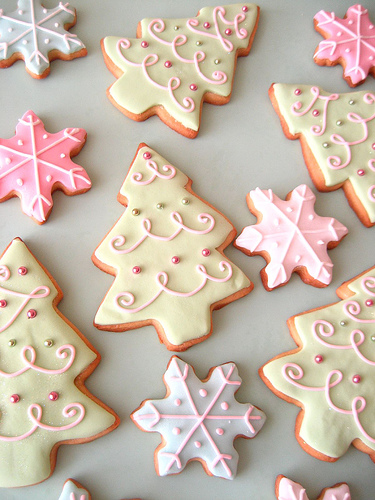
Don’t care to fuss? This technique works fine for any rollout cookie; no need to frost or decorate.
And how about chocolate chip, oatmeal, peanut butter, and all your other favorites?
Yes, they’re easily made ahead and frozen. Twenty minutes after unexpected guests arrive, you can ask, “Can I offer you a nice warm cookie, just out of the oven?“
Now THAT’S hospitality!
Place the following in a mixing bowl, and beat until combined:
1/2 cup butter
1/2 cup vegetable shortening
3/4 cup light brown sugar, packed
1/2 cup granulated sugar
1 1/2 teaspoons baking powder
1 1/2 teaspoons cinnamon
1 1/2 teaspoons ground ginger
1/2 teaspoon ground allspice or ground cloves
3/4 teaspoon salt
Add 1 large egg, and 2 tablespoons molasses.
Beat until smooth. Amazing how that one egg smooths things out, eh?
Add 1 1/2 cups
King Arthur Unbleached All-Purpose Flour. Mix until thoroughly combined, then add an additional 1 1/2 cups flour, for a total of 3 cups. Add 3 tablespoons cornstarch, along with the second batch of flour.
Mix to combine.
See how dry this looks? Scrape the bowl, and continue to mix…
…until everything looks well mixed, with no dry spots.
Divide the dough in half, flattening each half slightly to make a disk. Wrap in plastic, and refrigerate for 1 hour, or overnight. This chilling period will make the dough easier to handle.
Preheat the oven to 350°F.
Take one piece of dough out of the refrigerator, and place it on a piece of half-sheet parchment (16 1/2” x 12 1/4”).
If you don’t have parchment, place the dough on a lightly floured work surface.
Roll it 1/8” to 1/4” thick. A thinner cookie will be crisper; a thicker cookie, more solid/soft (though not bendy soft; just softer than crisp).
Draw a mental line down the center of the sheet; or actually cut your dough in half, using a knife or pizza cutter. Your goal is to cut cookies that will fall on one or the other half of the paper; you’ll see why in a minute.
Cut out cookies, removing and saving the dough between them. You’ll re-roll and cut these scraps.
As the dough gets warmer, it gets trickier to remove the crooked, awkward pieces of dough in between cutouts; a toothpick helps.
Now, take a pair of scissors and cut that sheet of parchment right down the middle.
If you like, you can start with a half-sheet of parchment, rather than rolling on a full sheet and then cutting; you’ll just need to use a smaller piece of dough.
As you continue to roll out dough and cut cookies, lay the sheets of cookies into a 9” x 13” pan. Continue until you’ve used all the dough.
If you prefer rolling cookies on a floured surface, you can pick them up and transfer them to the parchment in the pan. If you don’t have parchment, substitute waxed paper or foil.
Why roll directly on the parchment? It’s great for sticky dough, and/or intricate shapes. It’s easier to pick up a piece of parchment with cutout cookies than it is to successfully move delicate cookies from your rolling surface to a pan.
Next, cover the pan with plastic wrap (or a shower cap), and place it in the freezer. Once the cookies are frozen, you can leave the pan in the freezer; or, to save space (and get your pan back), remove the pan from the freezer, quickly peel the cookies off the parchment, and store them in a zip-top bag.
I say quickly because you don’t want cookies defrosting and getting soft; they’ll stick together in the bag.
Ready to bake?
Remove the cookies from the freezer. If you’ve kept them on the parchment, simply transfer cookies, parchment and all, to a baking sheet.
If the frozen cookies have been bagged, take the bag out of the freezer, and quickly place the frozen cookies on a parchment-lined baking sheet.
Do you see the word “parchment” being used constantly here? It’s the test kitchen’s best friend – and it should be yours, too. There’s nothing like parchment for keeping pans clean, moving stuff around, storage, preventing sticking, and a host of other uses.
A single piece of parchment can be used over and over again, too. What’s not to like?!
Bake the cookies just until they’re slightly brown around the edges, or until they feel firm, about 10 to 13 minutes.
Remove them from the oven.
See how the edges are just slightly brown? It’s easier to see on the right of these cookies.
When the cookies are completely cool, you can choose to decorate them – or not.
I have a huge personal antipathy towards decorated cookies; the process ratchets my stress level WAY too high. So I prevailed upon my long-time buddy and fellow test-kitchen baker, Sue Gray, to do some simple decorating as I took the photos.
First, Sue whipped up some royal icing (honestly, it took her like 2 minutes), and put it in a plastic piping bag. After adding a small, plain tip, she was ready to go. She piped lines on the snowman’s hat, and sprinkled with
black sparkling sugar…
…then shook Frosty to get rid of any excess sugar.
Next, she piped a face, and buttons…
After shaking off the excess, she used a paintbrush to clean Frosty’s face.
Decorating like this isn’t hard, honestly; I just don’t have the patience (nor artistic bent) for it. So – thanks, Sue!
“Hey, how did she make that sparkling sugar stick onto the guy on the right?”
Brush the baked snowman lightly with corn syrup, honey, or maple syrup thinned with a bit of water; immediately sprinkle with sugar, shaking off any excess.