Why Pineapple Hill?
The pineapple has been a symbol of hospitality since the days of the early American colonies. According to legend, the symbol began with the sea captains of New England who would spear a pineapple on a fence post outside their home to let the community know of their safe return home and to invite friends to visit and share their hospitality.
Likewise, we hope Pineapple Hill Designs boutique will make you feel “Welcome”! We know how important it is to find something special for that certain someone or just the right accessory to complete a room. We believe everyday is a day to celebrate, and we have just the thing to help you create something special out of the ordinary.
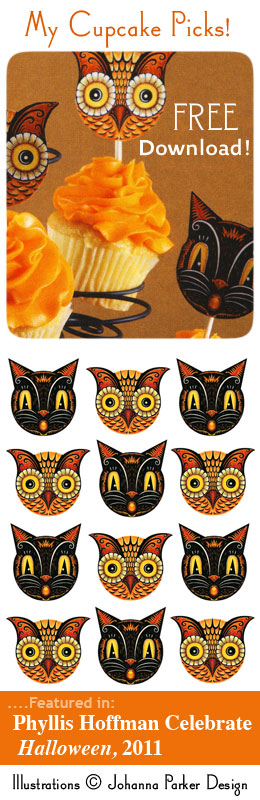
We found a fun Halloween Printable
by Artist, Johanna Parker at her : BLOG
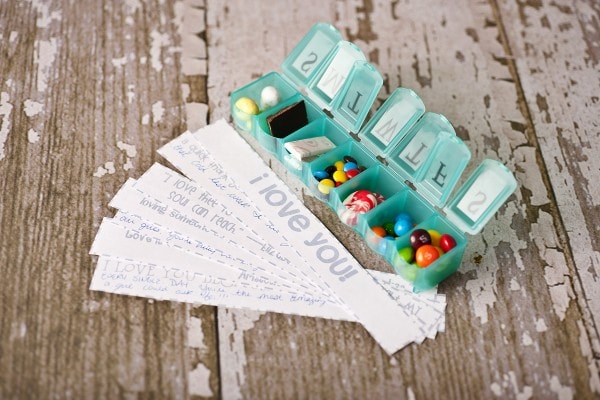
A Sweet Little Gift for Your Valentine
♥ ♥ ♥ ♥ ♥ ♥ ♥ ♥ ♥ ♥ ♥ ♥ ♥ ♥ ♥ ♥ ♥ ♥ ♥ ♥ ♥ ♥ ♥ ♥ ♥ ♥ ♥
7 Days of Love
♥ ♥ ♥ ♥ ♥ ♥ ♥ ♥ ♥
This adorable idea is from
♥ ♥ ♥ ♥ ♥ ♥ ♥ ♥ ♥
♥ ♥ ♥ ♥ ♥ ♥ ♥ ♥ ♥
You can find the “how-to”
and free printable
♥ ♥ ♥ ♥ ♥ ♥ ♥ ♥ ♥
 |
via purple onion
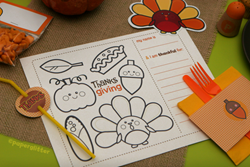
Cute Thanksgiving Place Cards
|
Remember these from last year:
via Martha Stewart
To help you create decorative place cards for the Thanksgiving table,
Martha Stewart has free clip art. Download and print the
place cards
(cream or neutral-colored card stock will work best),
cut along the dotted line, inscribe your guest's name,
and score down the middle with a bone folder.
You can also make a flat card with a border by using double-sided tape to affix the place-card design to a piece of card stock 1/4 inch larger than the place card. You can punch a hole in it and use twine to tie it to a napkin, or simply tuck it into the napkin.
via picky palate
note from Jenny at Picky Palate:
Another simple recipe that’s perfect for brunch or any
time of day for that matter. The cream cheese frosting on top is good enough to keep on hand for dipping fruit or crackers.
Pumpkin Spiced Cream Cheese Breakfast Rolls
Rolls:
- 2 packages/cans Pillsbury Crescent Rolls
- 4 0z cream cheese, softened
- 1/4 Cup brown sugar
- 1/4 Cup canned pumpkin (Libby’s)
- 1/4 teaspoon ground cinnamon
- 1/8 teaspoon fresh ground nutmeg
- Preheat oven to 350 degrees F. Unroll crescent rolls to form 4 rectangles placed side by side. Pinch seams together to form one long rectangle. Place cream cheese, brown sugar, pumpkin, cinnamon and nutmeg into a mixer; beat until well combined. Spread mixture over crescents leaving a 1/2 inch border around edges. Starting at long end, roll up then cut into 1 inch pieces. Place around 2 9 inch cake pans that have been sprayed with cooking spray. I left the centers open so the rolls form a circle.
- Bake for 28-30 minutes or until rolls are golden brown. Remove and let cool for 10 minutes. Frost warm rolls with cream cheese frosting recipe below.
Frosting
- 4 oz softened cream cheese
- 1/2 Cup powdered sugar
- 1/2 teaspoon vanilla
- 1 Tablespoon canned pumpkin (Libby’s)
Mix all ingredients into a large bowl until smooth. Spread over warm rolls.
Halloween Safety Tips
Halloween is right around the corner. Thousands of children will be out and about that night collecting their bags of goodies. As much fun as those kids will have, Halloween night requires parents to be extra vigilant with their safety.
By following these simple tips, you’ll greatly diminish your child’s risk of injury.
- Ensure your child has light reflectors on them to make them more visible in the dark.
- Keep your child in your sight. That will allow you to monitor where they are.
- Don’t allow teenagers to go out alone. Make sure they are in a group of kids. There’s safety in numbers.
- Make sure older children who go out with their friends have their cell phone. Have them check in with you periodically.
- Trick or treat in neighborhoods you are familiar with. Being caught out after dark in an area you don’t know is never a good idea.
- When you return home, before your child enjoys their treats, check the candy to make sure it hasn’t been tampered with.
- When your trick or treating with your children, be aware of where you are and who is around you. While Halloween is supposed to be a night of light-hearted fun for children, there are those who will take advantage of the anonymity of the costumes.
Halloween is a wonderful opportunity for families to spend quality time together indulging in carefree fun. There’s a pure joy in the shrieks and peals of laughter of children as they see the decorations and costumes. You’ll have a timeless memory as you watch your child race up the sidewalk anticipating the candy they’ll receive.
Children grow up so fast. Before you know it they’ll be hanging out with their friends. So enjoy this Halloween but do it safely.
Halloween Treat Tips
A favorite source:
an inkling of the goodies you'll find
just in time
8 Tips
for last minute
(never)
Halloween Hosts
more Halloween ideas
at
a free printable
Happy Halloween!

Back to School
25 Tips
for a Better School Year
 |
| via Real Simple |
Pencil Kit How-To
You will need a place mat that is approximately 18 inches wide. Lay it facedown; fold the right edge over to be 2 inches short of the left edge. Pin in place (see below). Use a ruler and a washable marker to draw parallel lines perpendicular to the fold, about 1 inch apart. Fold a shoelace in half, and tuck its fold between the layers at the midpoint of one side. Next, sew up the two sides of the pouch -- the shoelace will be sewn in -- and along the parallel lines. Slide pencils into the compartments, and roll the case toward the shoelace side, then tie the laces.
Fun Printables and Ideas
 |
via 18 twentyfive
|
|
Lunch Box Notes
 |
Babble via One Charming Party
HERE | |
|
|
|
 Rolo Pencil Treat
 |
| via Blackberry Vine |
To make your own:
3 1/2 " x 4 1/2 " yellow cardstock
pinking shears
3 1/2" x 1/2" pink cardstock 1" circles pink cardstock
3 1/2" x 3/8" aluminum foil
Rolos
Hershey kisses
adhesive
The body of the pencil (inside) is a package of Rolos and the tip of the pencil is a Hersheys Kiss attached to the Rolos with a glue dot.
To make the outside of the pencil, you cut a piece of yellow cardstock to 3 1/2" x 4 1/2", trim one short end with scallop edge or zigzag edge scissors, and score every 1/4" lengthwise...wrap around the Rolos and adhere.
Then wrap a 3 1/2" x 3/8 " piece of pink cardstock at the opposite end. Add a small pink circle to cover the exposed end of the Rolos.
Cover the seam between the yellow and pink pieces with a length of silver foil tape. Then just wrap the ends with a ribbon and tag.
Wishing everyone a Wonderful 2011/2012 School Year!
Thanksgiving Tables for Kids
 |
| via PBK |
Finger Puppet Favors
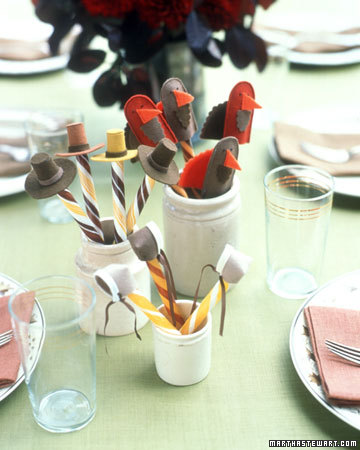 |
| via Martha Stewart | | | |
|
Click HERE for instructions
 |
via Country Living
To accommodate your youngest guests' abbreviated attention spans (and your desire to linger over dessert), cover the children's dining surface with kraft paper and set out pots of crayons for tic-tac-toe. Bonus: This tablecloth is a cinch to clean up. Stamped birch name cards ensure kids feel as special as grown-ups.
Turkey Trivia Place Card |
 |
| via Martha Stewart |
|
These place cards beckon kids to their seats and give them something to think about while the turkey is being carved.
Too Cute!
 |
| via HipHipHooray Blog |
|
 |
| via Tip Junkie |
|
|
|
The Paper Bag Turkey
 |
| via One Charming Party |
|
|
from PaperGlitter
 |
| image via South Shore Mamas |
 |
| via fiskars |


