Why Pineapple Hill?
The pineapple has been a symbol of hospitality since the days of the early American colonies. According to legend, the symbol began with the sea captains of New England who would spear a pineapple on a fence post outside their home to let the community know of their safe return home and to invite friends to visit and share their hospitality.
Likewise, we hope Pineapple Hill Designs boutique will make you feel “Welcome”! We know how important it is to find something special for that certain someone or just the right accessory to complete a room. We believe everyday is a day to celebrate, and we have just the thing to help you create something special out of the ordinary.
Don't these crack you up!
Strawberry Ghosts
Strawberry Ghosts published in Simple & Delicious
Ingredients
- 30 fresh strawberries
- 8 ounces white baking chocolate, chopped
- 1 teaspoon shortening
- 1/8 teaspoon almond extract
- 1/4 cup miniature semisweet chocolate chips
Directions
- Wash strawberries and gently pat with paper towels until completely dry. In a microwave-safe bowl, melt white chocolate and shortening at 50% power; stir until smooth. Stir in extract.
- Dip strawberries in chocolate mixture; place on a waxed paper-lined baking sheet, allowing excess chocolate to form the ghosts' tails. Immediately press chocolate chips into coating for eyes. Freeze for 5 minutes.
- In a microwave-safe bowl, melt remaining chocolate chips; stir until smooth. Dip a toothpick into melted chocolate and draw a mouth on each face. Yield: 2-1/2 dozen.
Almond Easter Wreath
This Colorful Candy Wreath comes together
in a short time and don't you thing the Egg-shaped Jordan almonds
make an especially sweet spring decoration!
**********************************
Step 1: Take a 12-inch Styrofoam wreath, and beginning with the inside circumference, hot-glue the almonds in place, overlapping a few of them to add dimension.
Step 2: Continue in a circular pattern until the entire front and inner and outer edges of the wreath are covered.
Step 3: Hang with a sturdy piece of cotton ribbon, or oversize rickrack trim as shown.
To store the wreath, wrap it in paper, place flat in a box, and keep in a cool, dry spot. It should last for one to two years.
 37
37
New Ways
to Decorate
Your Halloween Pumpkins
via
Country Living
Hit the road, Jack!
Carving just doesn't hold a candle
to these aha! ideas
for painting, decorating,
and displaying your Halloween pumpkin
click
Candy Corn Swirl Cookies
 |
| via The Simple, Sweet Life |
This recipe was discovered at
I can't wait to try it!
This is what you will need:
2 sticks (226 grams) butter, softened
1 cup granulated sugar
1 large egg
1 tsp. baking powder
1 tsp. vanilla extract
2 1/2 cups all purpose flour
Food coloring in yellow and orange
Visit the BLOG for complete instructions and more fabulous pictures!
{Yields about two dozen cookies}
Today is the First Day of the Rest of Your
Life
Make
Today a Beautiful Day!
Your friends
at Pineapple Hill
Patriotic Napkin Rings
 |
| via Martha Stewart Living, July 2007 |
Add a splash of patriotism to Independence Day place settings with our red, white, and blue napkin rings. The intricate accessories are simple to create.
All you need is colorful grosgrain ribbon, a handful of buttons, fabric glue, and some covered elastic.
To make the rings stand out, loop them around solid-colored napkins, such as the cobalt-blue linen ones we selected.
Napkin Ring How-To
You will need a 15-inch-long piece of 1/2-inch-wide grosgrain ribbon for each napkin ring. To begin, make a series of 1/2-inch accordion folds in the ribbon, holding them in place as you go. Push a threaded needle with a 1-inch tail through the gathered folds, along the bottom edge. Holding on to both ends of the thread, carefully slide the folds into the shape of a circle. Before closing the circle, tie the ends of the thread into a knot, snipping off any excess. Glue the ends of the ribbon together with fabric glue to create a full circle with a small hole in the middle. Thread 4 inches of covered elastic through 2 holes of a button, and tie the ends into a knot. Glue the button to the center of the bottom side of the burst.


Happya FlagaDay
I am the flag of the United States of America. I was born on June 14, 1777, in Philadelphia.There the Continental Congress adopted my stars and stripes as the national flag.
My thirteen stripes alternating red and white, with a union of thirteen white stars in a field of blue, represented a new constellation, a new nation dedicated to the personal and religious liberty of mankind.
Today fifty stars signal from my union, one for each of the fifty sovereign states in the greatest constitutional republic the world has ever known.
My colors symbolize the patriotic ideals and spiritual qualities of the citizens of my country.
My red stripes proclaim the fearless courage and integrity of American men and boys and the self-sacrifice and devotion of American mothers and daughters.
My white stripes stand for liberty and equality for all.
My blue is the blue of heaven, loyalty, and faith.
I represent these eternal principles: liberty, justice, and humanity.
I embody American freedom: freedom of speech, religion, assembly, the press, and the sanctity of the home.
I typify that indomitable spirit of determination brought to my land by Christopher Columbus and by all my forefathers - the Pilgrims, Puritans, settlers at James town and Plymouth.
I am as old as my nation.
I am a living symbol of my nation's law: the Constitution of the United States and the Bill of Rights.
I voice Abraham Lincoln's philosophy: "A government of the people, by the people, for the people."
I stand guard over my nation's schools, the seedbed of good citizenship and true patriotism.
I am displayed in every schoolroom throughout my nation; every schoolyard has a flag pole for my display.
Daily thousands upon thousands of boys and girls pledge their allegiance to me and my country.
I have my own law—Public Law 829, "The Flag Code" - which definitely states my correct use and display for all occasions and situations.
I have my special day, Flag Day. June 14 is set aside to honor my birth.
Americans, I am the sacred emblem of your country. I symbolize your birthright, your heritage of liberty purchased with blood and sorrow.
I am your title deed of freedom, which is yours to enjoy and hold in trust for posterity.
If you fail to keep this sacred trust inviolate, if I am nullified and destroyed, you and your children will become slaves to dictators and despots.
Eternal vigilance is your price of freedom.
As you see me silhouetted against the peaceful skies of my country, remind yourself that I am the flag of your country, that I stand for what you are - no more, no less.
Guard me well, lest your freedom perish from the earth.
Dedicate your lives to those principles for which I stand: "One nation under God, indivisible, with liberty and justice for all."
I was created in freedom. I made my first appearance in a battle for human liberty.
God grant that I may spend eternity in my "land of the free and the home of the brave" and that I shall ever be known as "Old Glory," the flag of the United States of America.
~written by Melanie
Fly your Flag!
********************************
The American Flag:
Continental Colours
(Top left)
This 1776 flag reflects the sentiments of our forefathers: The British Union Jack acknowledged the colonies' origins; the stripes, their emerging independence.
Stars and Stripes
(Top right)
The Flag Resolution of 1777 specified that there should be one star for each state but did not specify configuration. Each flagmaker arranged the stars to his or her liking.
Star-Spangled Banner
(Bottom left)
Two stars and stripes were added in 1795 in recognition of Vermont and Kentucky. This version inspired the Francis Scott Key poem that became our national anthem.
Grand Old Flag
(Bottom right)
In 1912, President William Taft approved the first detailed standards for flag proportions. This flag, with 48 stars, was official until 1959 -- the longest-flying version.
New Uses for Nail Polish
1.
Seal
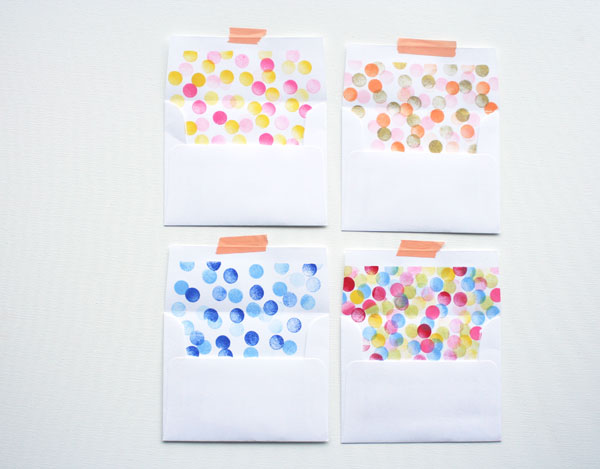
an envelope
by swiping some clear nail polish along the part you’d usually lick!
 |
| via Oh Happy Day |
2.
To
prevent
rust rings in the shower,
you can apply clear nail polish to the bottom of the shaving cream
can.
3.
Keep
ribbons from
fraying
by
painting the ends with clear nail polish. This works for shoelaces and ropes
too.
4.
Gives
screws extra durability
by
painting with a coat of polish and allowing to dry before
using
5.
A
tiny bit of clear nail polish can
touch up small dents and scratches on
hardwood floors and
can help prevent further damage to the area.
6.
Dip
the end of a piece of thread into a bottle of clear nail polish for easy
needle threading.
 |
| via Anne Weaver |
7.
Reset
loose stones in inexpensive costume jewelry
with
a coat or two of clear nail polish. This also gives the jewels a little extra
sparkle.
8.
Prevent
ink from running down your labels
by
covering with a coat of clear nail polish.
9.
Rustproof
your metals
by
covering them with a clear coat.
10.
Prevent
jewelry from tarnishing
or
turning your skin green by painting over it with a
clear coat.
11.
Get
ride of warts. To
eliminate warts, cover with clear nail polish. After a week, they’ll be gone.
Remember to throw away the polish you have used afterwards to prevent the virus
from spreading.
12.
Give
a glow-in-the-dark effect for remote control
buttons. Dab
some glow-in-the-dark nail polish on the buttons. You’ll never have to worry
about pressing the wrong button when it’s dark again.
13.
Waterproof your
matches. To make sure your
matches will work even when they become damp, dip the flammable head in clear
nail polish. You’ll be assured to light a cozy campfire.
14.
Fix window screens or
shades. A little tear in your
window shade will become worse as time passes. Prevent it by sealing the hole
with a dab of nail polish.
- Smooth
splinters
and
rough areas on old vintage wood hangers.
- Quick
fix for most of your adhesive needs! Use it to secure loose
glasses screws, reset jewelry stones, or repair small
wood chips in furniture or
hardwood floors.
- Keep
small dings or chips in your car from rusting
or
getting worse by dabbing a small amount of clear nail polish to the affected
area.
- Secure
buttons
by
putting a dollop of clear polish in the center. This will keep them from ever
coming unsewn.
 |
| via leesie bella |
- Make
finding the right key a breeze.
Never know which key is which? Paint a
strip or dot with nail polish to color code them.
- Keep
buttons shiney.
If you have a vintage coat or dress with pearl buttons, paint them with a coat
of clear polish.
Hope you enjoy this weeks tip
♥


